SnowsBest resident Fit2Ski guru, Guillaume Tual, reveals five TRX drills that will have you ready for the slopes this winter.
One of the best pieces of fitness equipment one can purchase is a TRX (or Suspension Trainer). These days they are in almost every gym but it is also super easy to use where ever there is a door, a tree, a bar or anything safe and solid you can attach it to. During the summer, I love to jog down the park, attach my TRX to a solid branch, do one lap of the oval then do a few sets on the TRX and repeat the whole circuit 4-5 times.
Skiers love to use the TRX because no matter what exercise you perform, you’re pretty much guaranteed to use your core muscles effectively as gravity can be your worst enemy.
Here’s a set of 5 TRX drills that will target the glute-quad-hamstring complex while engaging your core muscles in a very efficient way to keep you strong on the slopes.
Before starting any program, make sure you warm up properly with a combination of dynamic stretches and aerobic activities to bring your heart rate up. You can jog, row, cycle or do the following set:
Perform 10 repetitions of the following exercises:
- Bodyweight squats (knee depth)
- Forward-Reverse Lunge (maintain upright torso)
- Clock Hops (half a meter hops front-centre-right-center-back-center-left-center)
- Curtsy Lunge with trunk rotation (towards back leg)
- Downward Dog to Front Step (replace right hand with right foot and repeat)
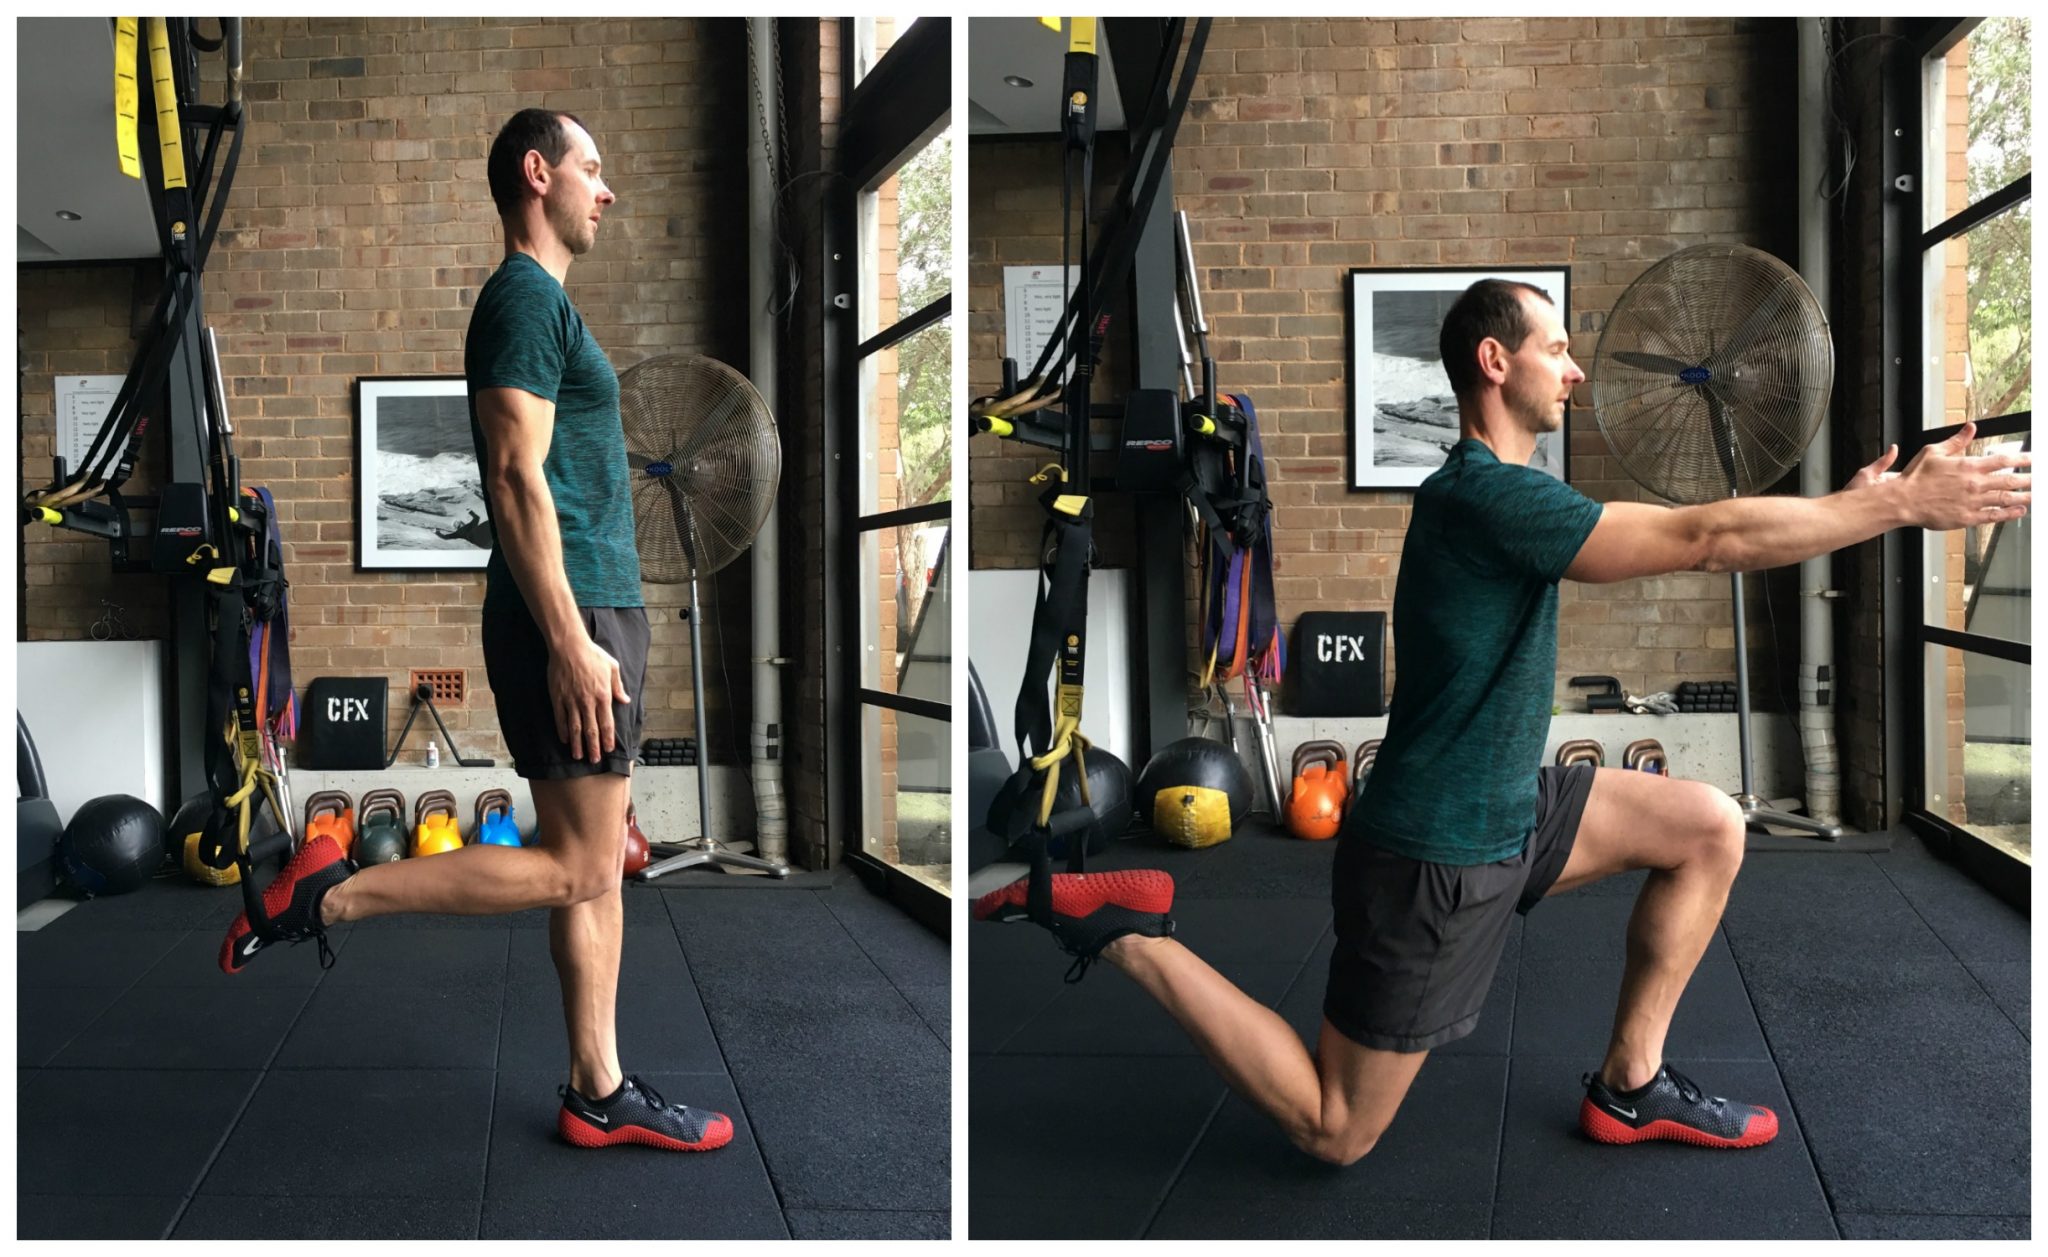
TRX Single Leg Reverse Lunge
How: Set the TRX so the foot strap is at knee height. Place one foot in the strap and face away from the anchor then take one big hop forward. Start by clinching your bum so you stand tall and steady. Lower yourself down by driving your back leg backward until your knee brushes the floor. Make sure to keep your front leg knee just over your ankle (don’t move forward over the toes). Drive your front leg heel into the floor (activates glutes) to stand back up. Maintain a calm breathing through your belly as you lunge up and down.
Tips: If you are feeling unbalanced, you can old on to a chair, foam roller or anything grounded. This will help you focus on the up-down movement but this also mean that you need to work glutes and core more often. Also, focus on flattening your ground foot: it’s very easy to grip with your toes. Instead, flatten you foot but drive your big toe into the floor to create tension in the foot mid arch (which directly links to your deep core muscles)
Progress: You can do this drill barefoot on a mat to increase foot-to-core tension. You can also add a little hop as you lunge back up and try to control the landing.
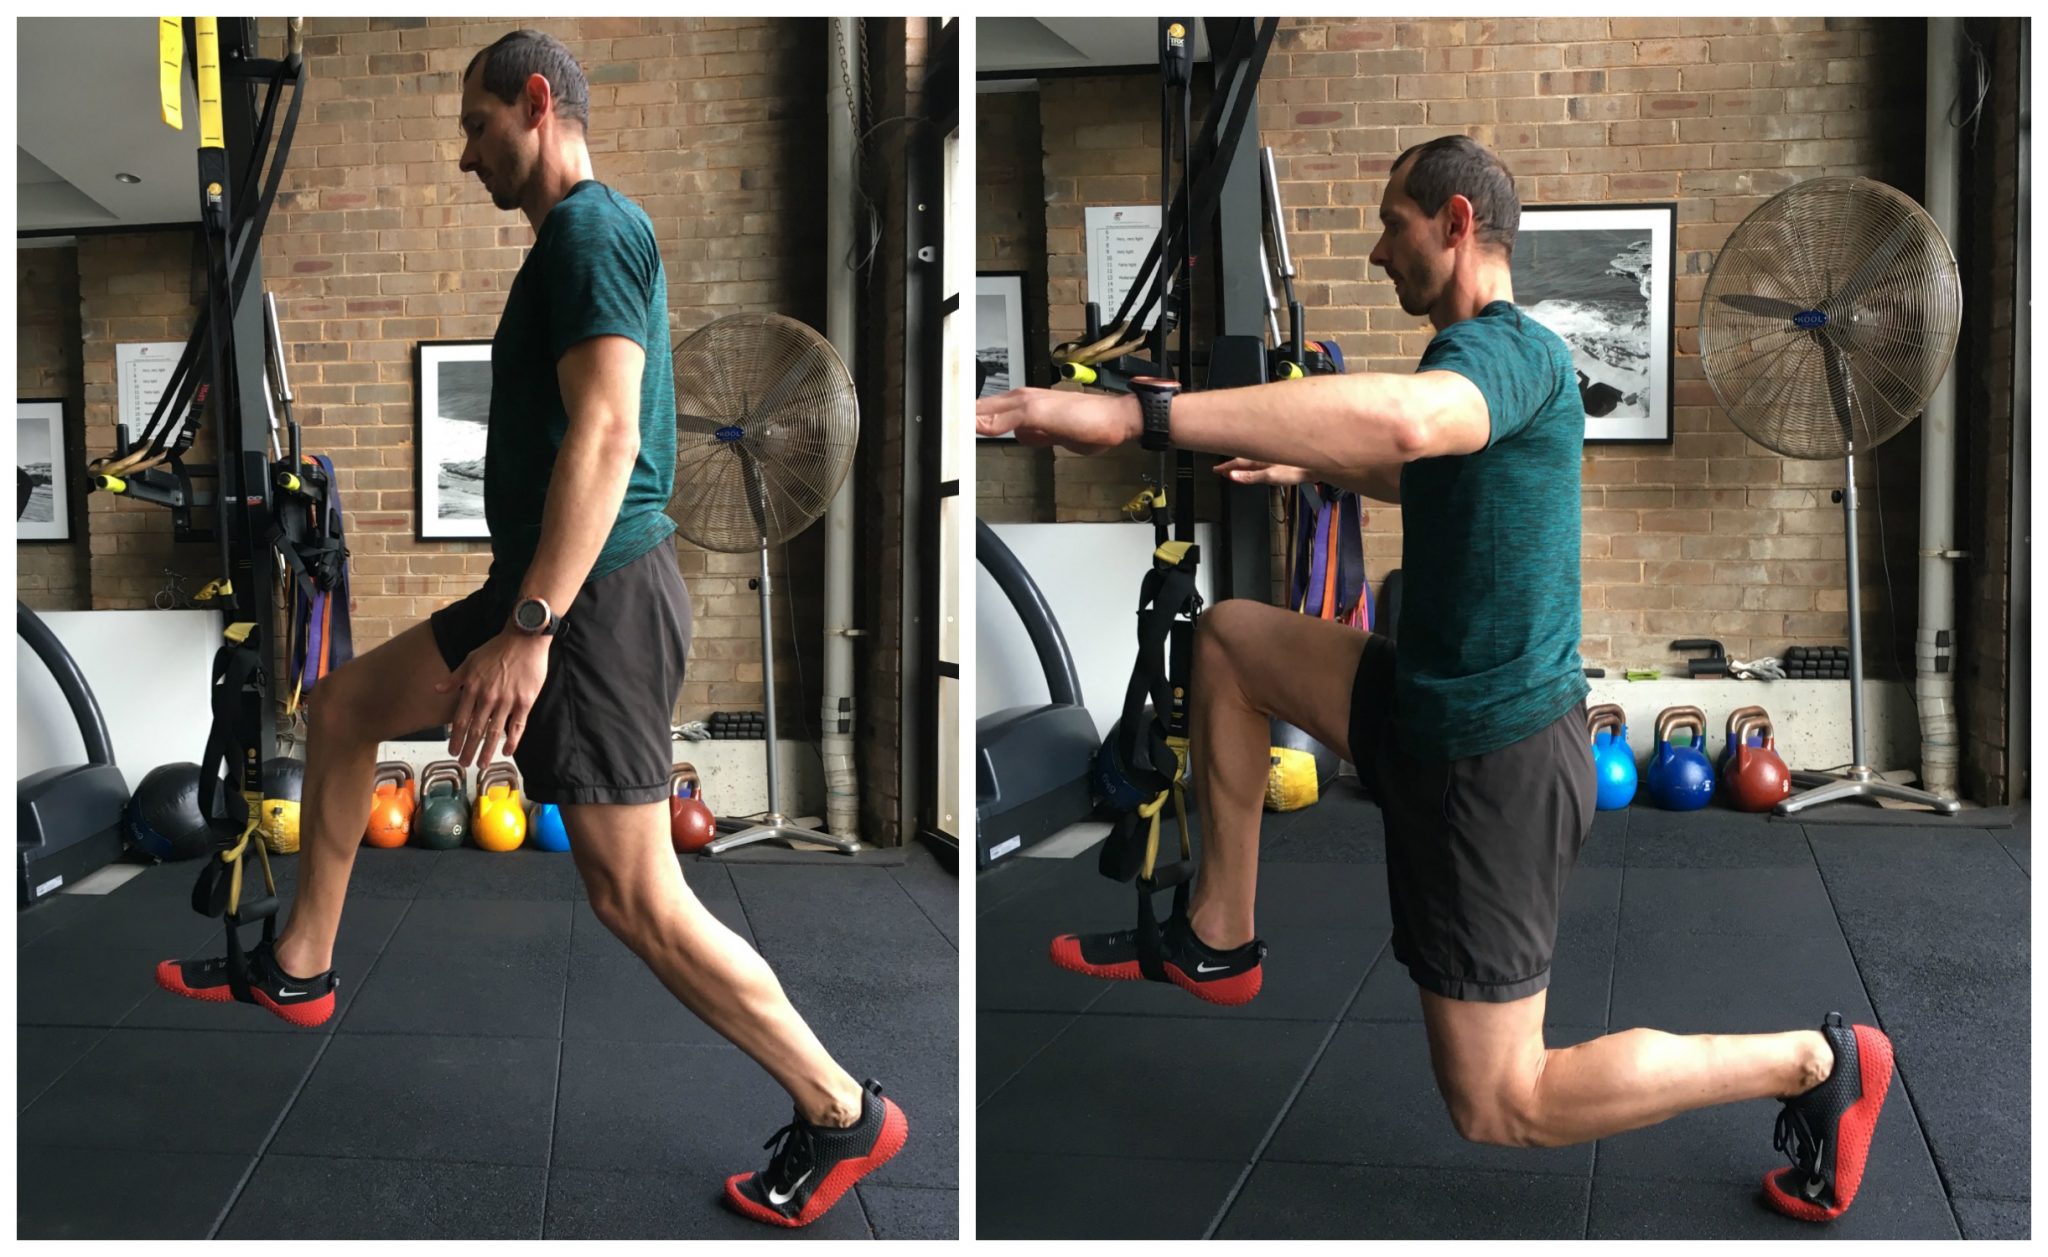
TRX Front Lunge
How: Set up one foot strap at knee height. Position one foot in the foot strap facing the anchor and take one big hop back. You can hold onto something stable as this is challenging for your balancing skills. You should immediately feel the tension from your calves to your core through your quads and glutes. Carefully lunge forward but try to keep your weight evenly distributed between both feet. Push back from the front foot to return to the start position.
Tips: You can squeeze all you want but if you hold your breath will lose it all. Once you find your balance, focus on breathing into your belly throughout the movement. Place your arms wherever it helps to keep you balance point for longer. As you get better, assume a downhill skiing position with your elbows by your side and don’t rush it. Hold on to any stable object at first to increase stability, and let go as you get better.
Progress: Perform this drill slowly and pose at the end of the movement to load the legs for longer. You can also have the ground leg barefoot to increase foot to core connection.
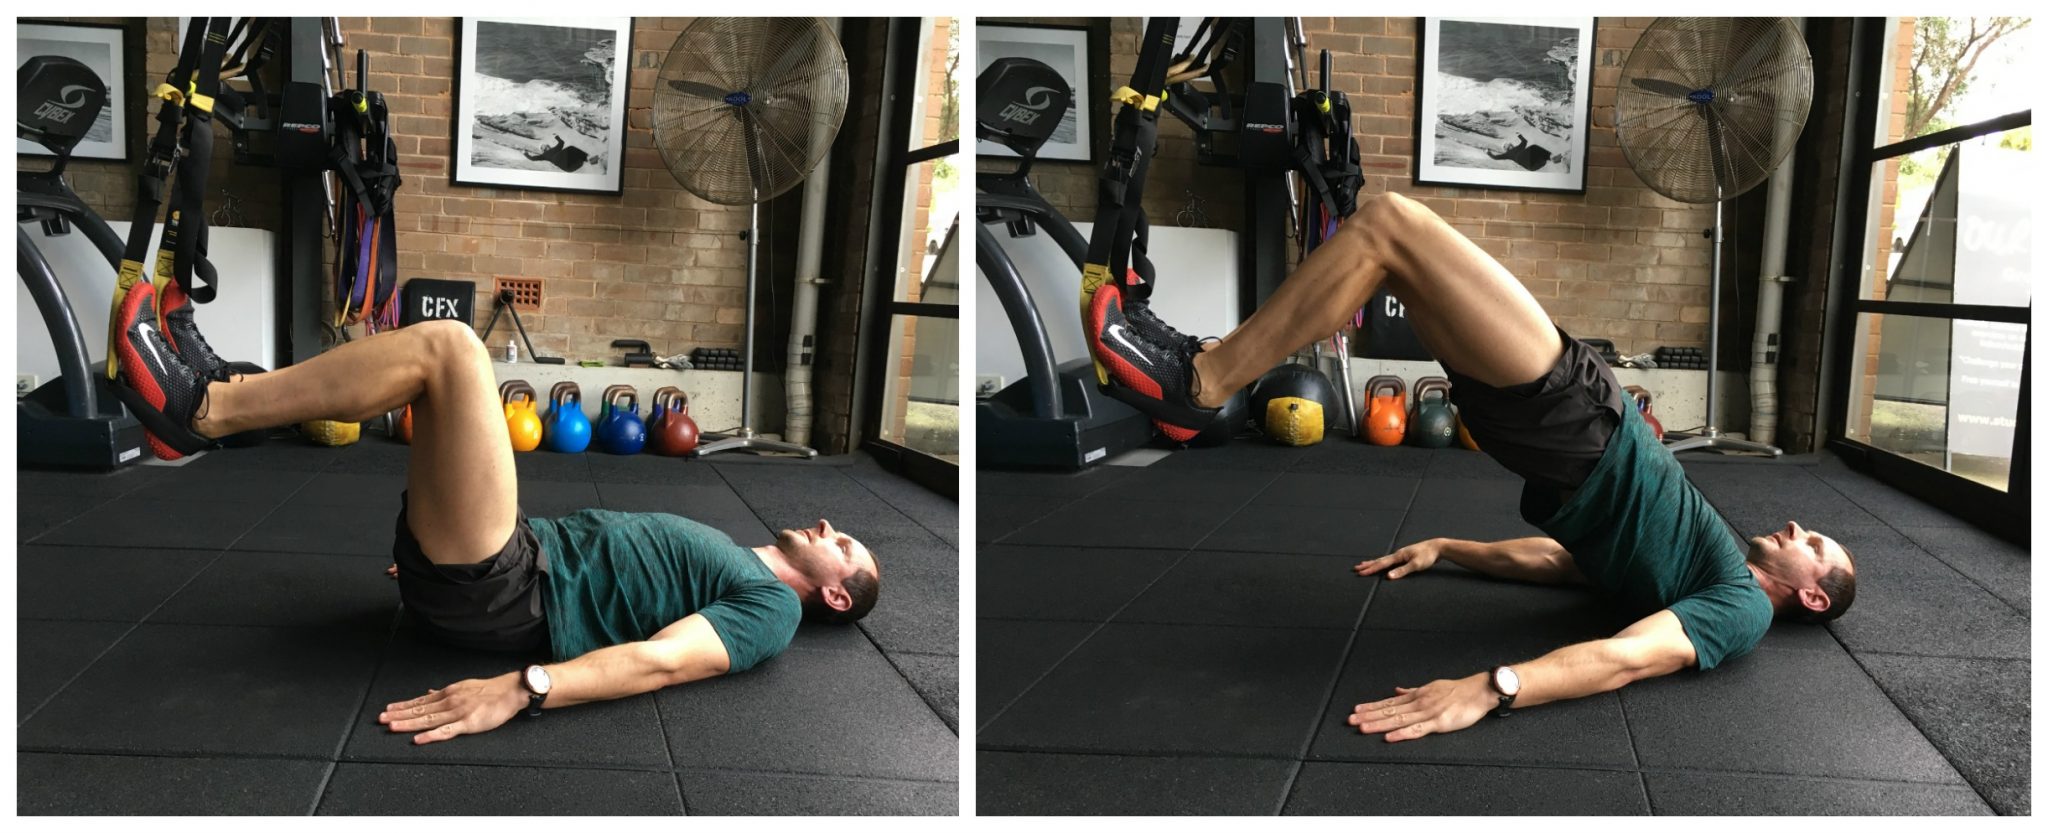
TRX Bridge
How: Lay on the floor with both heels in the foot straps. Place your hands alongside your hips and bend your knees over your hips. Tilt your pelvis back to flatten your lower back against the floor. It is important to maintain this position throughout the entire movement so you maximise glutes activation. Raise your hips off the floor until you reach a straight line from knees to shoulders. Hold this position for 5 seconds before lowering your hips down.
Tips: Try to relax and breathe into your belly. It will be easy to tense your feet or hold your breath but you must focus on the hips and clinching the buttocks.
Progress: Take your arms off the floor, it will get more wobbly. If you want to engage the hamstrings more, simply pull your heels towards your buttocks but beware of cramping!
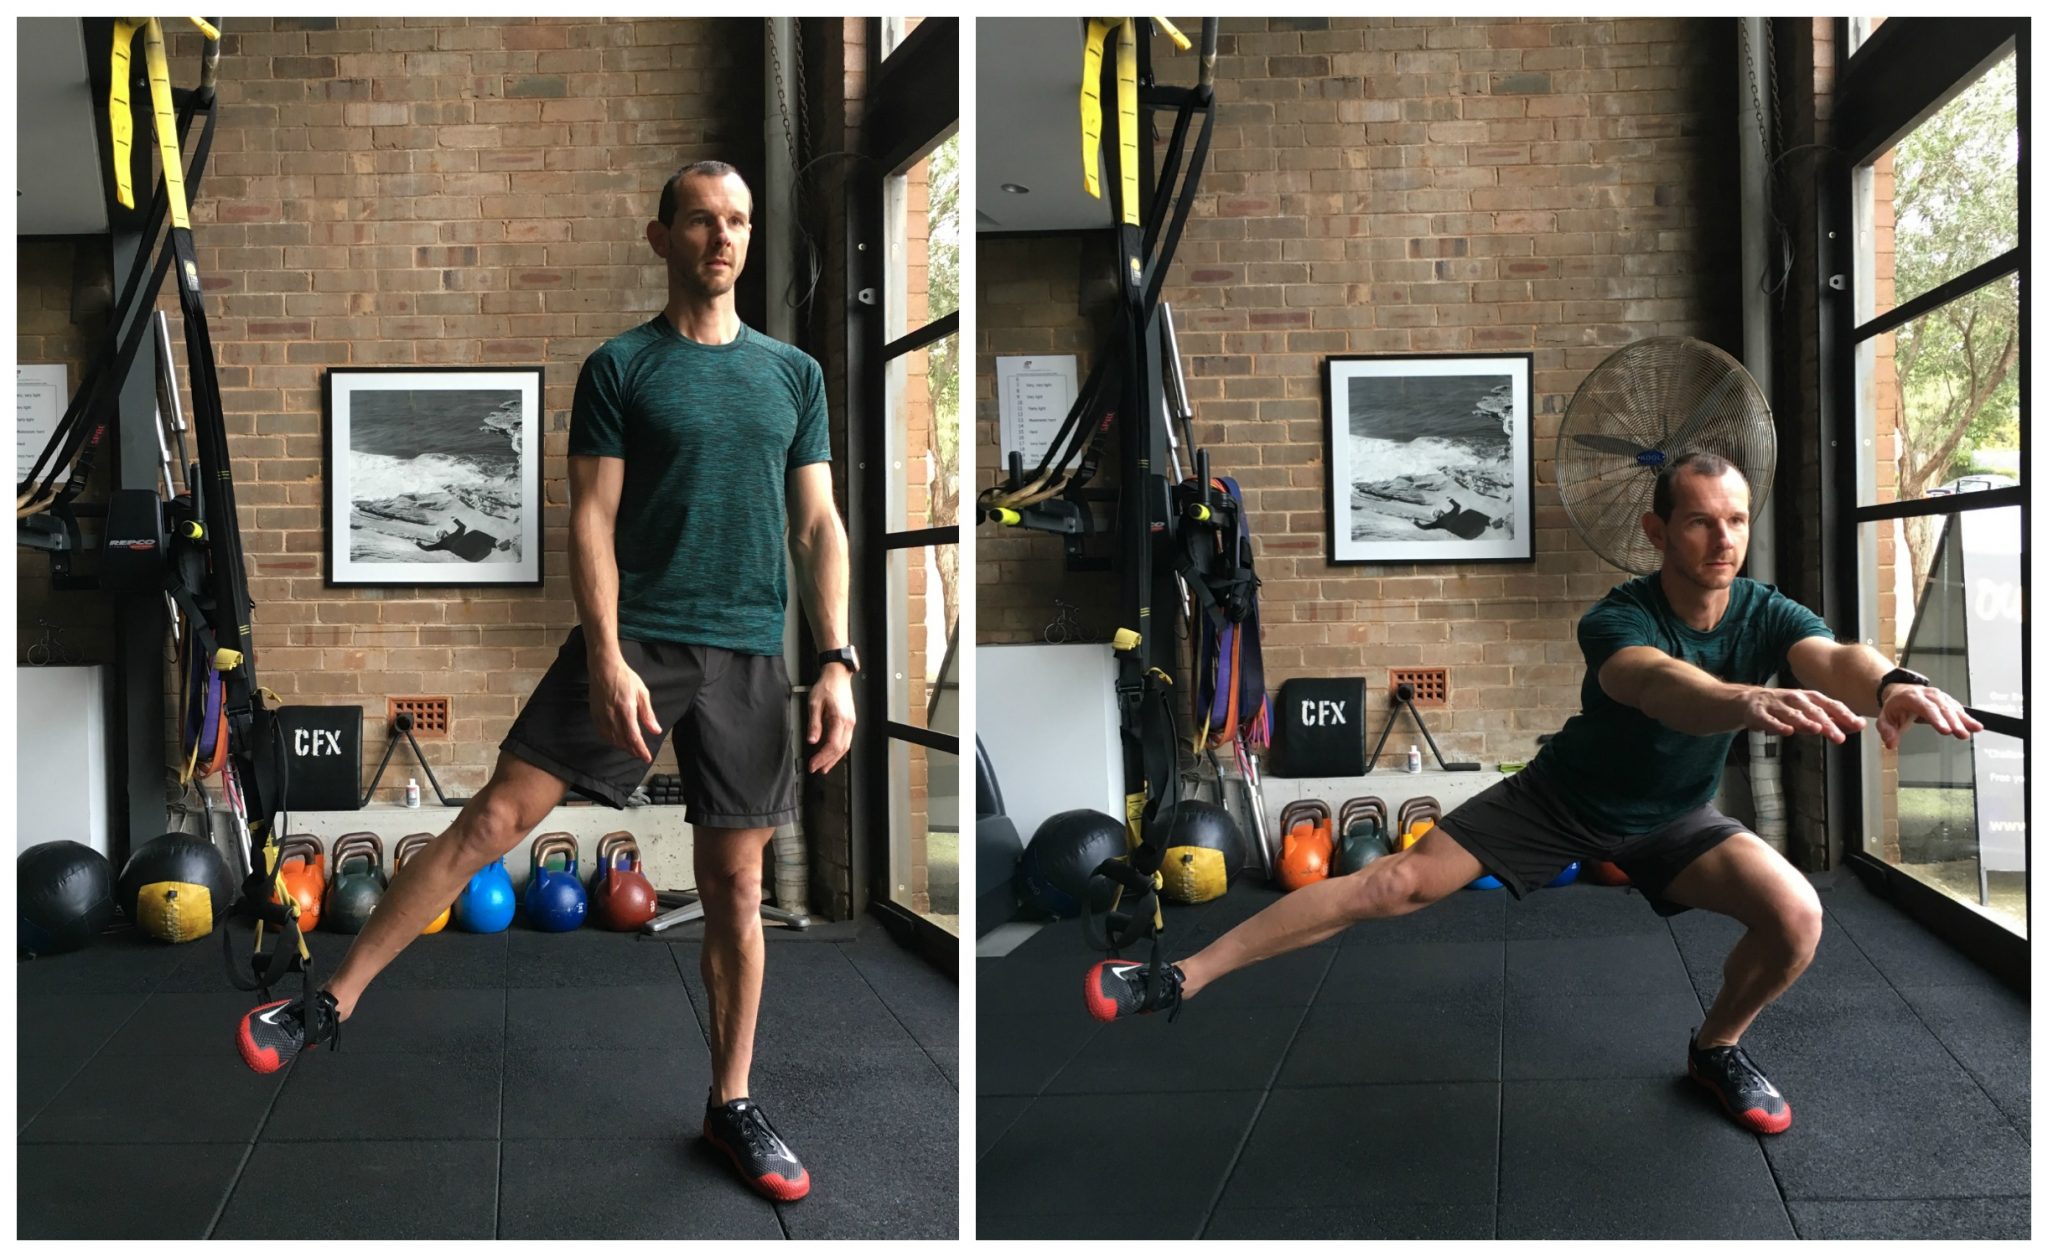
TRX Side Lunge
How: Set the foot straps just below knee height. Step aside and place one foot in the strap as you face sideways to the anchor. The goal is to load the ground leg while your hip is pulled open. Drop your hips down to knee height as if you were performing a single leg squat. Make sure that your hip-knee-ankle stay in line then drive your heel down to come back up. Maintain a straight back and look ahead.
Tips: If your knee is caving in, chances are your glutes are not doing their job. Clinch your buttocks and ground your foot to increase stability through your base of support. You may also feel a stretch in your groin area and it’s ok, just go as low as it feels comfortable. If your ankle mobility is restricted, place a small plate (or a book) under your ground heel.
Progress: You can simply add weight (dumbbell, kettlebell, ball) or increase the tension time (the slower the harder). Add a little hop as your stand up for more explosiveness.
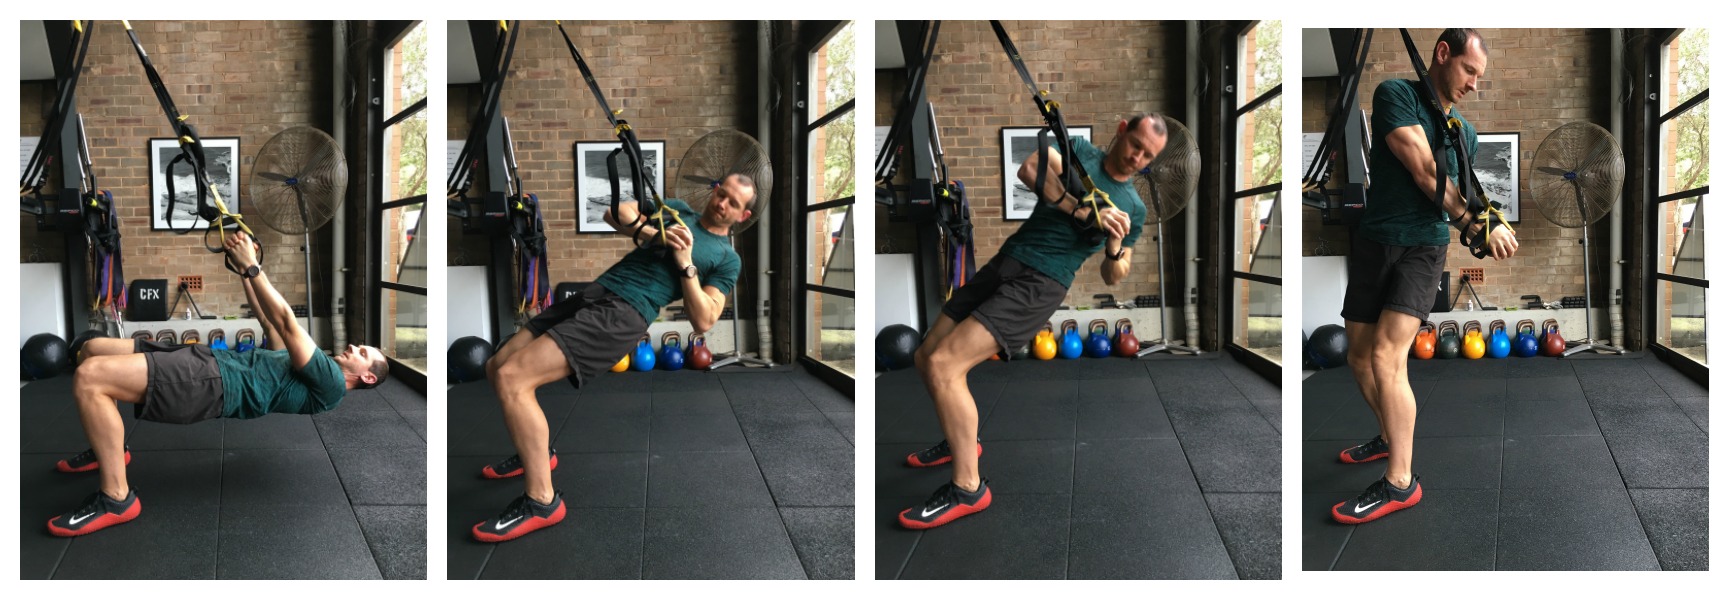
TRX Double Arm Rotational Pull
How: Adjust the straps so the handles are at hip height. Place your feet under the anchor (further back makes it easier) and lean back with your arms straight holding one handle with both hands. Clinch your buttocks so you create a straight line knee-hips-shoulders-head (no saggy bum!). Pull yourself up to bring both hands in front of your chest then pushdown as you rotate until you fully stand up. Control the descent the same way until your torso is parallel to the floor. Repeat on the other side.
Tips: This drill allows you to use your back, chest, arms and trunk in one movement making it an allrounder exercise. To decrease the resistance , simply step back; the more parallel to the floor, the more difficult. Keep your eyes on your hands throughout the movement to avoid straining the neck and control the descent.
Progress: You can elevate the feet (on a Step box for example) so you will start in a decline position or maintain straight legs. This is a pretty advanced exercise in itself so progress/regress by adjusting your feet position in regard to the anchor.
Note: You should consult your physician or other health care professional before engaging in any exercise program to ensure you are in good physical condition to perform the exercise programs and you understand there is a risk of physical injury.
Check out more of our Fit2Ski articles here.


